Getting Started
Access to Labtrac
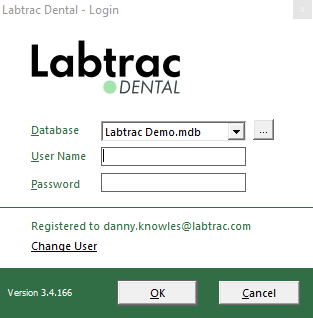
Open Labtrac.
The Username and Password will both be ‘sys’ by default.
If you wish to add personlised users go to User Manager
Inputting Your Data
Things to Consider Before Getting Started
Now Labtrac is set up, you will need to enter all required data (Dentists, Products, Materials etc)
Price Lists
Before you set up your Dentists, Products and Materials make sure you have a clear understanding of all the pricelists that will be in use.
Remember
The Pricelist is NOT the Standard of work (eg. NHS, Independent, Private)
Dentist Codes
Every dentist in Labtrac needs a unique code. If you already have a coding system in place then you can carry on with that. If not we recommend using the first 4 letters of the surname followed by 01 (in case of duplicates then 02, 03, 04 etc).
Labtrac allows a dentist code of up to 8 characters.
EG.
- WRIG01 - Owen Wright
- WRIG02 - Michael Wright
Product Codes
When setting up product codes in Labtrac there are a few things to bear in mind;
-
There must be a product code for every standard of work that you do. Meaning if you do NHS, Independent and Private work then you will need 3 codes for each product. In the example below the code (PBC - for Porcelain Bonded Crown) is suffixed with either a N, I or P depending on the standard.
- PBC-N for (NHS) Porcelain Bonded Crown
- PBC-I for (Independent) Porcelain Bonded Crown
- PBC-P for (Private) Porcelain Bonded Crown
Delivery Methods
-
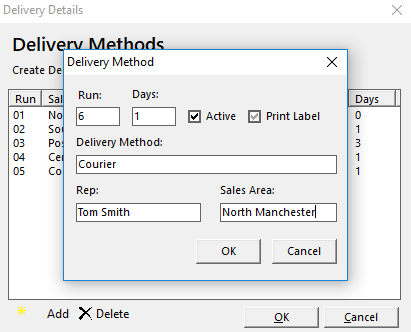
To set up how the dentists recieve the work open Delivery Details from the content bar on the left side of the screen.
-
This opens a list of all your Delivery Methods to add a new one click Add in the bottom left.
-
Select the Run number, which will identify this particular method of delivery.
-
Select the Days. This is the amount of time you want to allow for the job to arrive in surgery after leaving the Lab.
-
Enter the details in the Delivery Method section (eg Postal, Courier, Hand Delivered etc)
-
The Rep and Sales Area boxes are optional additional infomation, it is not needed to set up a Run.
Adding a Dentist
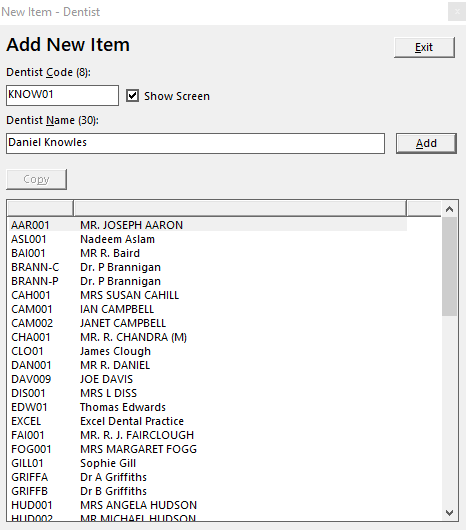
To add a new Dentist, click Dentist in the contents bar then Add F2 at the top of the Labtrac screen.
In the new window enter a Dentist Code and Dentist Name. To see our recommended coding system please see Product Codes.
Once you have entered a code and name click ‘Add’
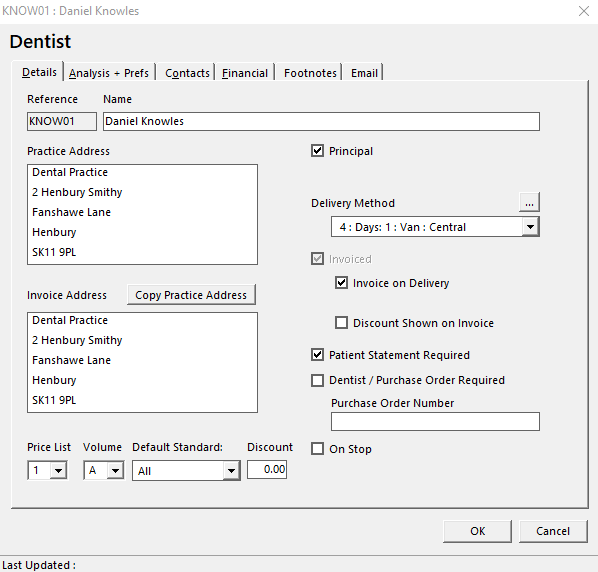
This will open the dentist details page.
First select whether the dentist is the principal or an associate. If the dentist is selected as the principal this means they receive all their own invoices and handle their own account. If they are selected as an associate you can select whether to invoice the principal or associate.
Enter an address. The first address being the practice address then the invoicing address. If these are the same, you can use the copy address button once you have entered the practice address.
(If the dentist is selected as an associate you can use the copy address button next to the principal’s name to copy their address into all address fields).
Once the address is entered you can then choose from the invoicing options.
The first check box is Invoiced if the dentist is selected as the principal this will be greyed out as a principal must be the one to receive their invoice. If the dentist is selected as an associate, then the invoiced box is optional.
Remember
If invoiced is selected - The associate receives and handles their own invoice. This means they pay their own account. If invoiced is NOT selected - The principal handles the associates invoices. The principal handles and pays the associate’s invoices.
The next thing to look at is Price Lists and Volume Discount make sure the dentist is selected on the correct list or discount.
Analysis + Prefs
Here you can enter any preferences a dentist may have. This will show on the job details page as well as on the job ticket.
If you have set up any analysis fields they will also appear in this tab.
Analysis codes can be used for anything you like and are set up by yourself in System Settings.
If you are a MyDentist lab analysis fields 4 + 5 will be used for the Practice Number and Dentist GDC number. This is where our corporate invoicing module will pull all the relevant information from.
Financial
Tax Code - here you can enter the amount of tax you wish to charge this dentist (tax must be set on the product/material also)
Volume Discount - you can set the % discount for the dentist.
Settlement Details - Enter the % discount you would like to apply. The days in which they must pay to receive the discount. The terms in writing to appear on the document.
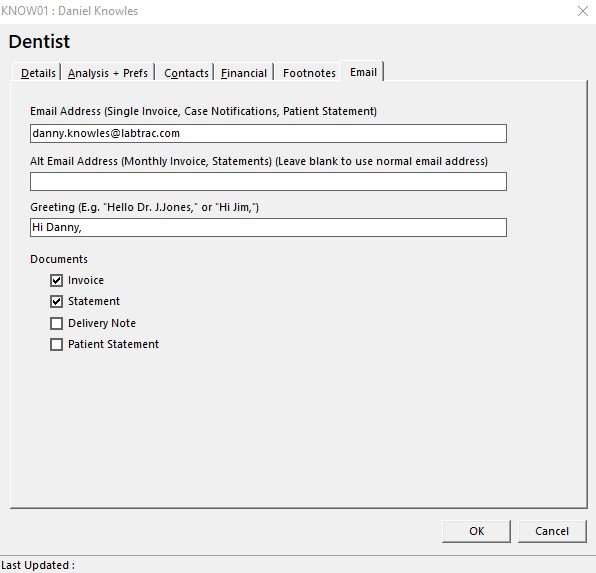
Enter the dentist’s email address. If there is more than one email address enter a semi-colon, then a space before typing the next email. (eg. example@email.com; example2@email.com)
You can then enter a greeting in the greeting box.
Select the documents that you wish to send by email.
Remember
If a document is selected to be emailed it will no longer appear in the printable lists.
The Dentist is ready to be entered by clicking OK.
Adding Products
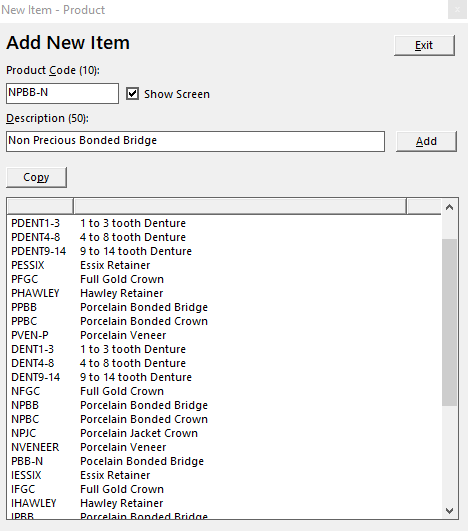
To add a new Product click Products in the contents bar then Add F2 at the top of the Labtrac screen.
In the new window enter a Product Code and Description. To see our recommended coding system see Product Codes.
Once you have entered the code and description click Add to open the product details page.
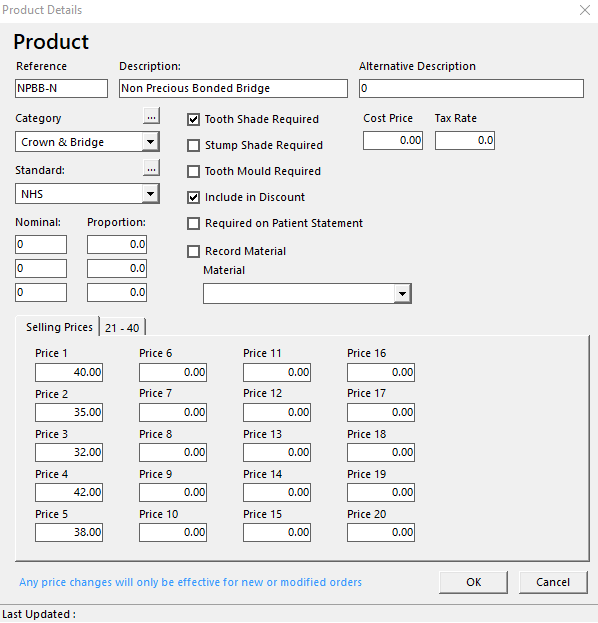
Enter a Category.
-
If you have not yet set up your categories click the dotted box next to category. This will open a window which you can enter categories of your choice.
-
The categories are optional but are a good way of seperating the lab into different areas - this will allow you to run reports on different aspects of the lab.
-
The categories can be whatever you like.
-
EG: Crown & Bridge, Orthodontics, Implants, Mouthguards, Dentures, Miscellaneous, etc.
Then select the Standard. Here you differentiate between quality of work. (eg. NHS, Independent or Private work or Standard, Superior, Exceptional etc).
If your Standards are not already set up you will need to do so in the same way as the categories above.
Select whether or not a tooth shade, stump shade or tooth mould are required.
Remember
If you select the product as requiring a shade, Labtrac won’t allow you to enter a job without this information. If you leave these boxes unchecked you still have the option to enter this information on a job, however, it is not mandatory.
If the product always requires a material tick the Record Material box and selecting the material from the dropdown menu. When you then add that material to a job, Labtrac will automatically add the selected Material.
Enter the price for every price list you are going to use.
If you wish to charge tax on a material enter the amount (in %) that you wish to charge. This will only be charged to a dentist set up to receive tax.
Adding Materials
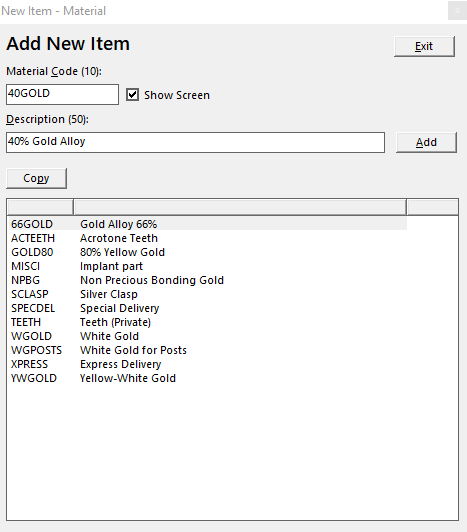
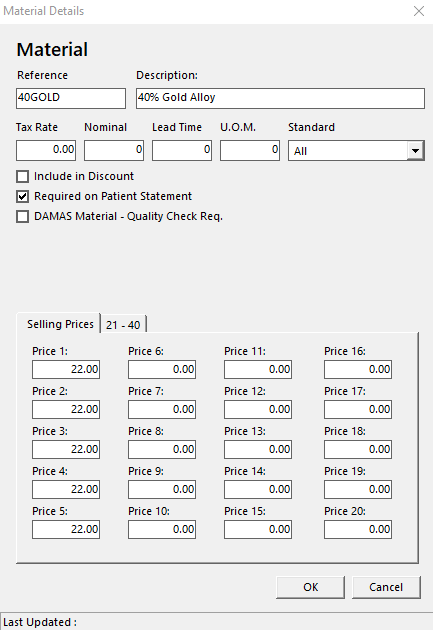
Go to Materials in the Contents bar then, ‘Add F2’ at the top of the Labtrac screen.
This will open a new window where you can enter a Material Code and Description. To see our recommended coding system please see Product Codes.
Click Add this will open the Material details page.
Enter the price for the product in every Pricelist that you use.
If you charge tax on the material, you can add that (in %) in the Tax Rate Box.
You can also add a Standard (which is set up in the Adding Products section) if applicable.
You also have the option of adding a nominal code (for use with external accounting systems) a Lead Time and U.O.M (unit of measure). These are all for your reference only.
Adding a Job
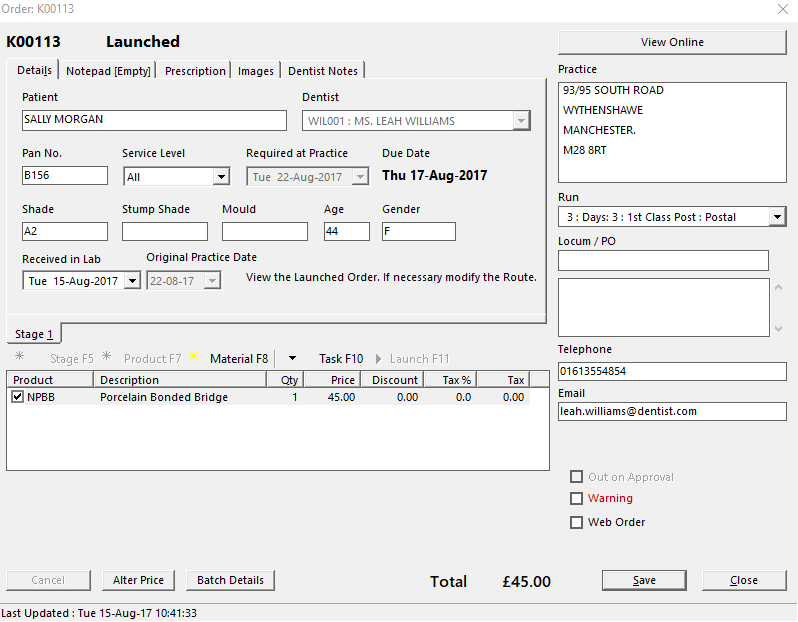
To add a new job click on Live Jobs in the contents bar then Add F2 to open the Job entry screen.
First add the patient name followed by the dentist the job is for.
Enter the Pan Number and Service Level (if required)
The date Required at Practice.
Then add any additional patient information you require. (Tooth Shade, Stump Shade, Tooth Mould, Age, and Gender)
To enter a product click Product F7. This will open a list of all products set up on your system. You can navigate through this list using the search box.
To add a material click Material F8. This will again open a list of all materials set up on your system. You can search using the search box.
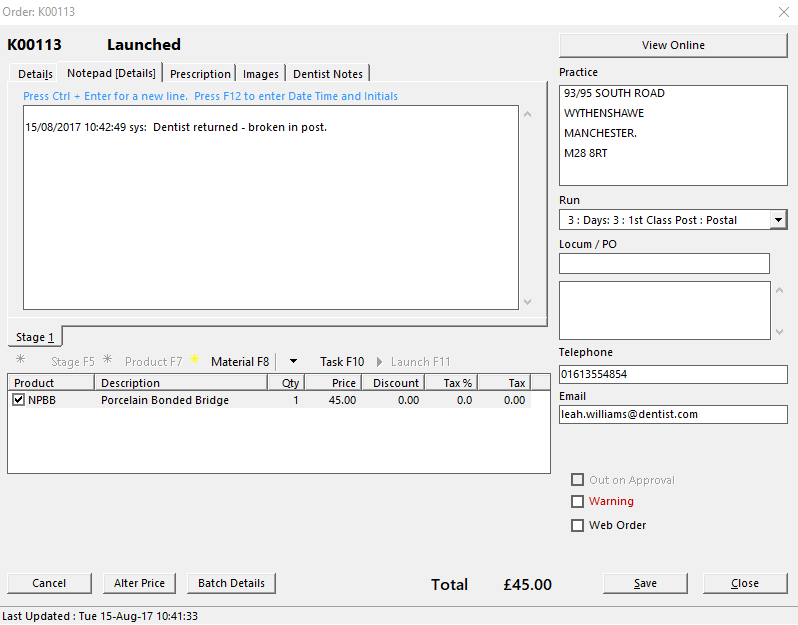
In Notepad you can enter any information on the case you may want. This will only be available to be viewed within the lab.
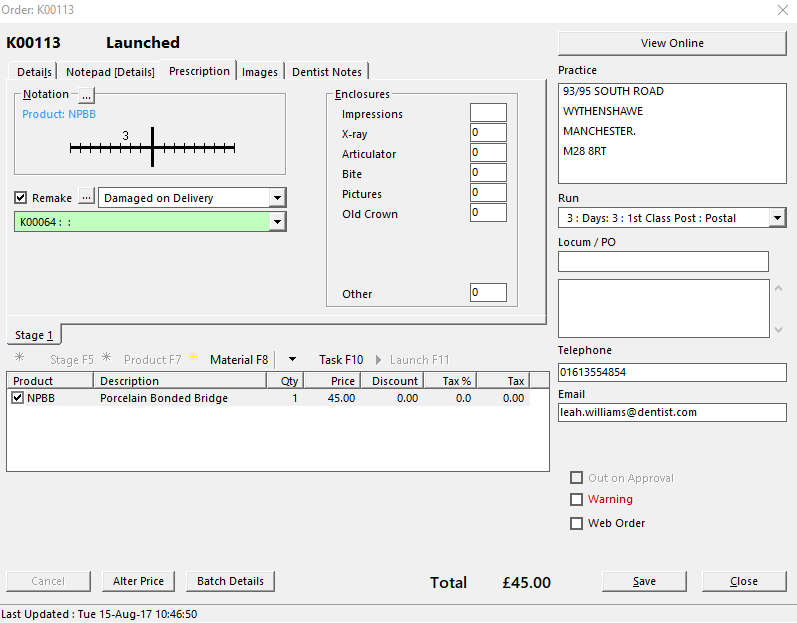
In Prescription you can add a notation.
- Click the box next to notation and select the teeth.
You can select the job as a Remake
- Click the remake check box.
- Select a reason for a remake from the dropdown menu. To add a new reason click the dotted box.
- In the green dropdown menu you can select the original job that is being remade as a reference.
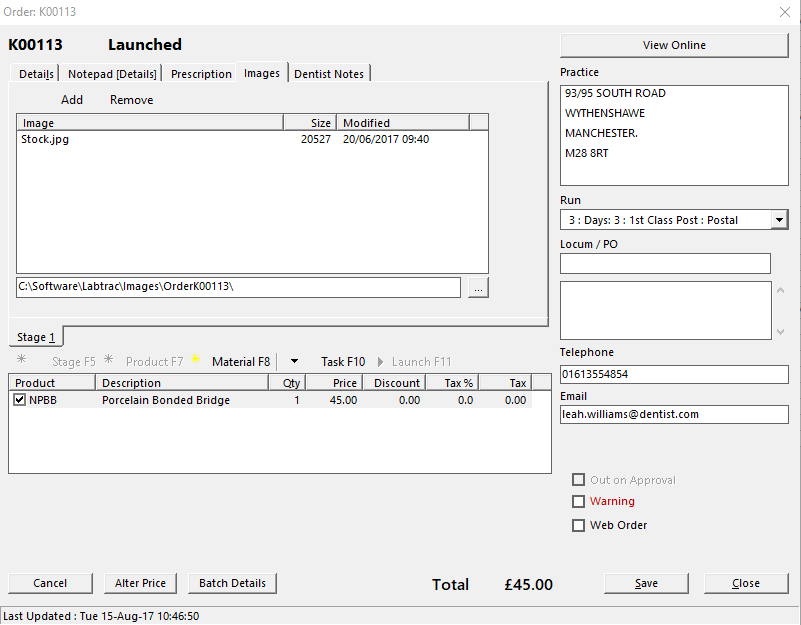
You can attach images in a job in Images
Remember
Its not just images you can add to the job using the Image section. You can also add PDF’s, 3D scans, and more.
It will ask if you wish to create an image folder. Click yes.
Then add images to this folder by clicking Add and navigating to the image you would like to store on the job.
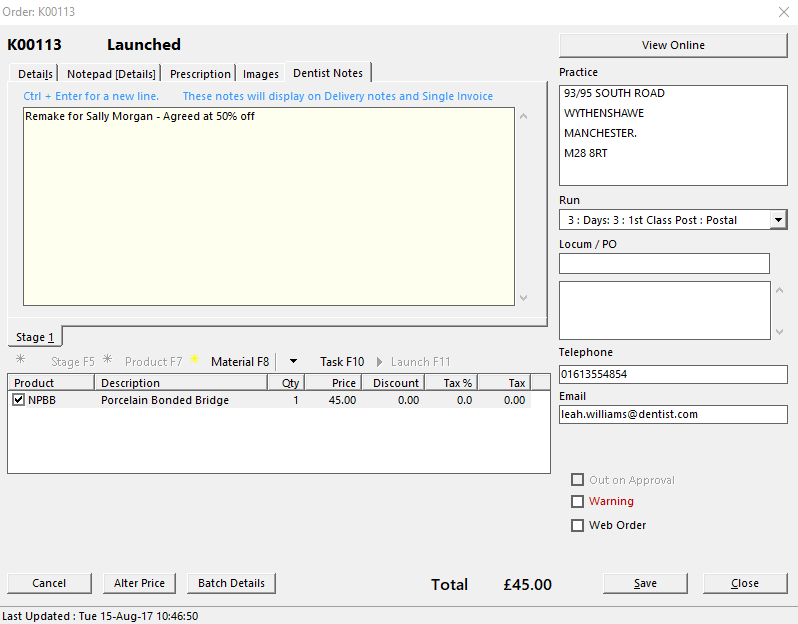
In Dentist Notes you can write any infomation you would like to send back to the dentist. This will appear the delivery note or single invoice.
Now the job is ready to launch do this by clicking Launch F11.
Completing the Job
-
Open up a job that is ready to be completed.
-
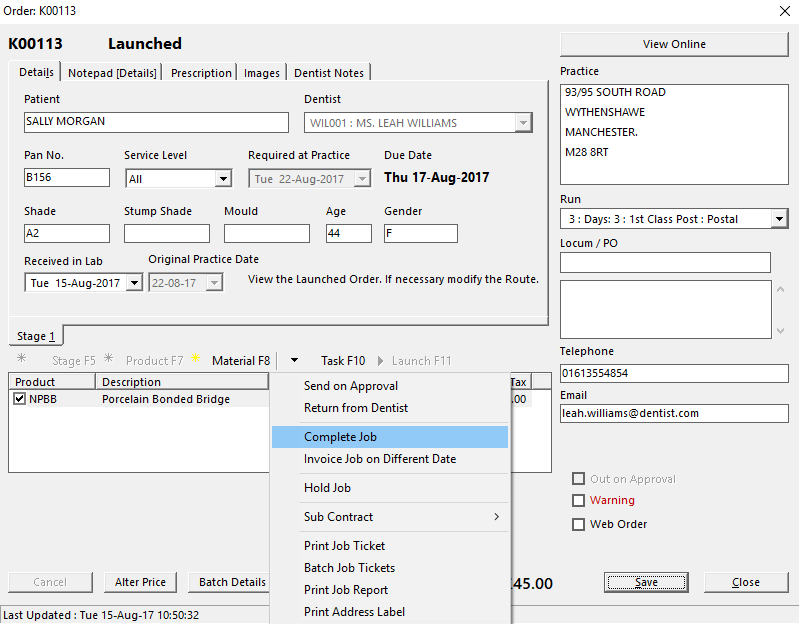
Click Task F10.
-
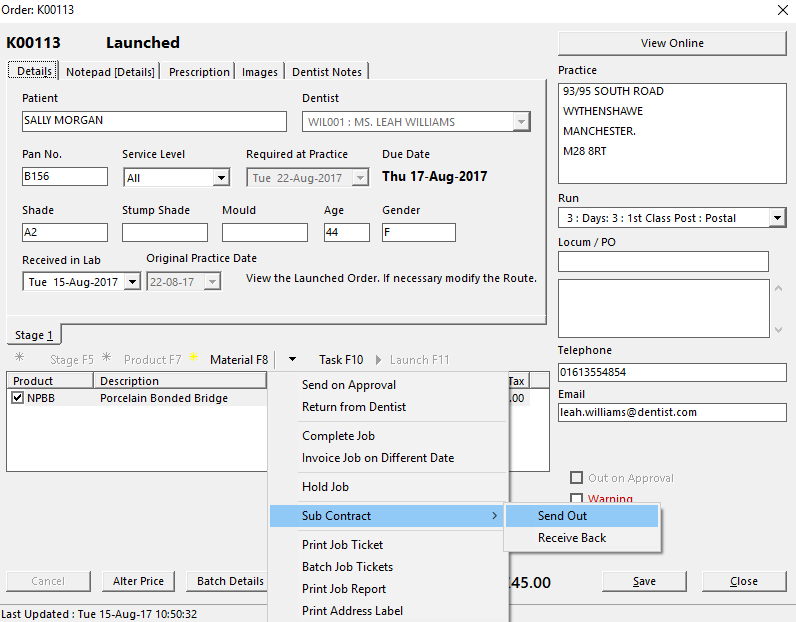
This is where you can change the status of a job in Labtrac to a few different things. Such as the work being ‘Out on Approval’ (see Stage Work), Surgeon Return (see Stage Work), Hold Job, Sub Contract (see Sub Contracting) a job and Complete Job.
-
If any detail on the job need ammending before completion select Hold Job and make any changes that are needed. Then Launch Job again.
-
Click Complete Job this will set the job as completed and produce all relevant documents.
Stage Work
-
Enter a job and fill out all the required information.
-
Launch the job.
-
When the job is ready to be sent back to the dentist, re-open the job. Then click Task F10. This will show a dropdown menu. Select Send on Approval. This sets the job status to Out on Approval stating that the work is no longer in the lab.
-
When you receive the work back from the dentist open the job up and again go to Task F10 and select Surgeon Return. Labtrac will prompt you to change the Pan Number and date Required in Surgery .
-
To add the new stage, click on Stage F5. Select the products for the next stage and again Launch the job.
Repeat these steps as many times as needed before finally completing the job as normal.
Sub Contracting
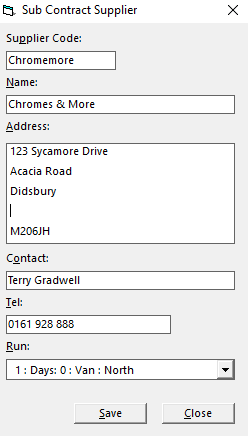
To Sub Contract a job, first you need to set up a list of Sub-Contractors.
-
Double click Sub-Contractors in the contents bar.
-
Click Add and fill in the relevant infomation, making sure to add a Run then Save.
-
Now you have your Sub-Contractors set up you can go through and enter a job as normal, however, once you launch the job click on Task F10, select Sub-Contract then Send Out (This changes the Job Status to Sub Contract ). Then select the date that the work is due back to you.
-
When you recieve the work back again go to Sub Contract and select Receive Back.
Repeat these steps as much as necessary before completeing the job as normal.
